

Performing your First Syncs in Propexo
Syncs keep your Propexo integration up to date with the latest data from your PMS.
- Regular syncs only look back a limited amount of time to reduce record processing and avoid unnecessary API usage, which factors into your subscription cost.
- If you need to pull in older records, you can run a backsync to load historical data.
Enabling an Integration
By default, new integrations start in a disabled state. This ensures all necessary data access is in place before syncing begins.
To activate your integration:
- Open the menu in the top-right corner of the page (three dots).
- Click Enable.

First Sync
Once your integration is enabled, Propexo will begin its first sync with your PMS.
- Small dataset: as little as 60 seconds.
- Large dataset: up to several hours.
During this process, you may need to refresh the page to view updated results.
Backsyncing
A backsync loads all historical data from your PMS into Propexo.
- Useful if you need a complete dataset beyond what regular syncs provide.
- Recommended upon initial integration setup.
To perform a backsync:
- Click the Sync Now button on your integration view.

- Select Back-Sync.
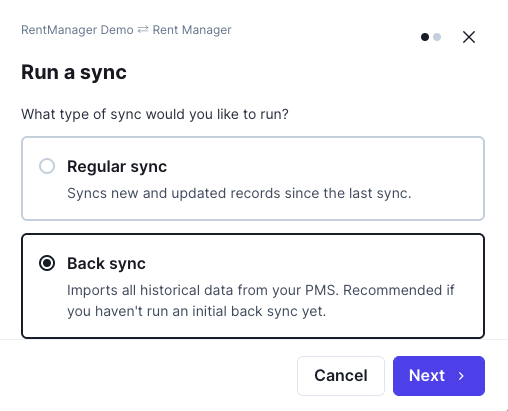
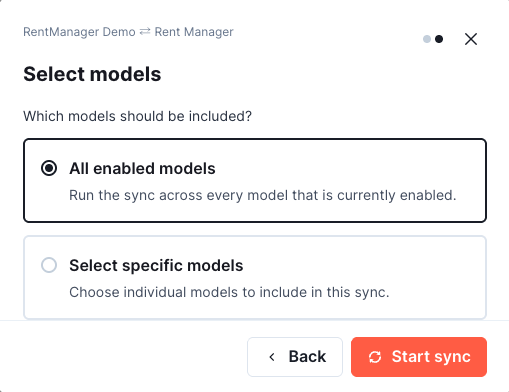
- Choose to backsync all models, or select which models to backsync. For a new integration, it is highly recommended that all models be synced.
- Click Start Sync.
Manual Syncs via the Propexo API
You can also trigger syncs directly through Propexo’s API:
- Manual Sync: Trigger a Manual Sync
- Backsync: Trigger a Backsync
When making these requests, you can specify which models to include in the sync.
This allows you to:
- Limit the scope of the operation.
- Reduce processing.
- Speed up sync times.