

Propexo Introduction and First Integration Setup
This video is an introduction to the Propexo dashboard and how to set up your first integration. This particular integration setup is for an Entrata integration and covers many of the common steps you’ll need to take to get your integration working.
Video Transcript (transcribed by AI)
Hi, my name is Nick. I am a co-founder and the CTO of Propexo. I wanted to put together this video just to give you an introduction for what to look at. First things to look at in the dashboard, how to understand some of the data, how to create a new integration, and how to modify your enabled data models.
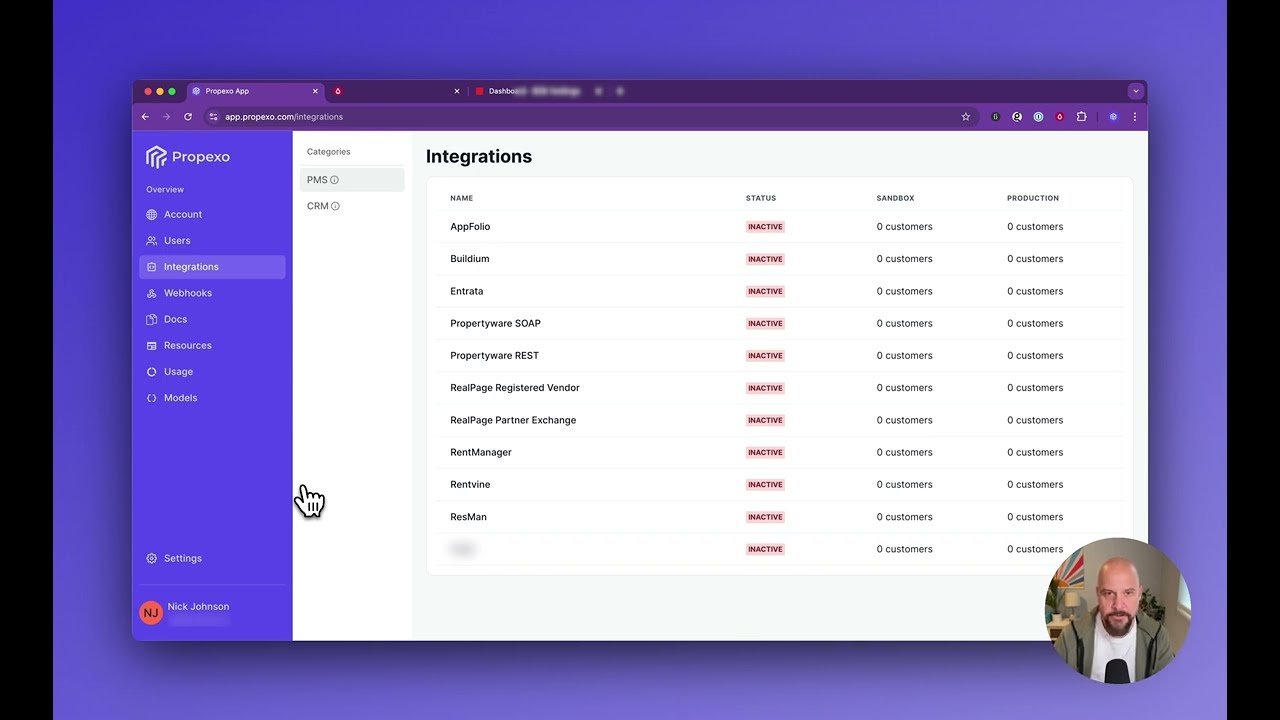
Let’s dive right in. Once you log in to the dashboard, you’ll see the screen and I’ve brought out a couple of things just for some privacy. Obviously, there’s some API keys there. Nothing, none of this stuff is actually used in production anyway. This is a demo account, but just for safety’s sake. There’s not much to do on this page for you right now as part of this video, but the first thing I’d like to do is go to the integrations page here. Today, we’re going to create an Entrata integration. So under the PMS category here, we’re just going to click on Entrata.
Once this loads, you’ll see a new customer. We’re going to create this in Sandbox, but you can get to production here and then Sandbox there. In Sandbox, we’re going to create a new customer and for Entrata, you’ll see the screen. This is your customer’s name. So it would be the name of a property or property manager, however you wanted to think about that to help yourself organize. We’re going to ignore enable new properties for now. It’s a concept that I will dive into in a different tutorial. Then company ID will be actually the subdomain for your customer. It would be their name, but the subdomain for their Entrata login. Then they’ll provide you with a username and password.
Now, I’ve already started to create this information. I have entered the company name, username, and password. Again, blurred out just for safety here, but I’ve just filled in those three fields and we’ll go ahead and hit submit.
So the customer’s created and you’ll see that the first thing that we’re going to do is start to figure out what access we have with those credentials. So we’ll let this run for a minute. This could take several minutes. So it’s probably best just to stay on this page and wait. It won’t take too long, but we want to see what the result is so that we know how to proceed.
Looks like we’re done. So if we scroll down, we can see service request is still going, but everything else is done. We can see a bunch of successes and a few failures. And that means that your customer in this demo situation did not enable access for Propexo or for you, for the credentials that they gave you to be able to pull in applicants, applications, events, or leads. So let’s just say that you actually do need that data. And so you would need to go back to your customer and say, hey, we need to be able to pull in applicants, applications, events, and leads, in which case they would come over here to their dashboard and go to apps and API access.
And they would find you on this dashboard. Your company name here, and they would go to manage, and they would go to web service permissions. And you can see here applications is disabled. So we’re just going to go ahead and enable them all. And then if we scroll down, leads is also disabled. We’re just going to go ahead and enable them all. And we’ll go to the bottom and hit save.
So that’s saved. We’ll come back here to Propexo and we’re just going to go back to our data access box here, and we’re going to hit retest. And we’re doing the same thing again, but hopefully now with credentials that will allow us to access that extra data that we’ll need.
Okay, great. So we’re done. And now you can see we have access to everything, including applicants and applications. Now, one thing you’ll notice is if you were to go hit the Propexo API right now, you will see that there is zero data. We have tested access to the Entrata API with those credentials, but we haven’t actually pulled in data just yet. And the easiest way to notice that is that under last run jobs, there are no jobs that have run. And a job is just us making a request to the PMS API. So the first thing that we’ll need to do is come up here and enable the integration. We’ll turn that on. And then once that’s enabled, we’re going to go ahead and manually trigger a sink for the data that we need.
[After sync completes]
Okay, and the sync is done. So if we scroll down here, we can see a couple of things. We can see that the average sync duration in this box was 35 seconds. That just means it took 35 seconds for that particular sync to run. It’s an average, but we’ve only run one sync, so this is the correct number. Concurrency means how many times we have configured the integration to actually interact with the Entrata API. So we’re at one request per one second right now. That is configurable, but you do have to be a little bit careful because certain PMSs, Entrata being one of them, do have rate limits that they enforce. And so this is part of that configuration, is making sure that we retain rate limit adherence.
Down here, you’ll see that it’ll show you a list of the most recent syncs. And we’ve only run one, so there’s only one here. You can see that we saw 127 records, and we created 127 records, which checks out because this is the first time that we have run a sync with these credentials. So 127 records created at 100% success rate, meaning none of the requests to Entrata failed. Scrolling down a little further, we can see each of the Entrata APIs that we requested against, and then how many times we made requests to those APIs. You can see that several times we hit that API four times, and that is simply because we do page requests. And so that just means that this particular sync took a total of four pages for each of those APIs.
Now, one thing that you would notice if you were to go hit the Propexo API right now, is that if you were to pull applicants or applications, you would actually receive zero records back. You would receive an empty array on a successful 200 status code. And the reason for that is because you were initially set up with a certain number of data models configured in Propexo.
And those will generally include properties, leases, residents, units, which you can see here, residents is enabled, leases is enabled, and units is enabled. But what’s not enabled is applicants. And so if that’s the case for you and you do need applicants, then you can come over here and you can enable them yourself. This is just a little note here that this will increase your cost with Propexo because we’re processing more data for you. So just a little warning there.
So that’s enabled. Let’s also enable leads just for the sake of this demo. And I think that’s probably good enough for now. So now if we were to come back to integrations, find our Entrata integration. And we’re going to now run a new sync to see if we can pull in those additional records that we’ve just enabled the models for.
[After second sync completes]
Okay and that sync is complete and we’re just gonna refresh the page to the statistics below refresh and we scroll down and we can see now there are two sync records. The first one that we already saw was 127 records seen and the second one is now 151 records seen and that’s because we enabled new models which means we processed additional data on your behalf with 24 additional records created.
So just sort of gives you an idea for how enabling new models will impact increases to records processed which maps to your cost with Propexo and then below here we can see there are some additional queries made in the past 24 hours to the endpoints that we worked with before including some new endpoints that we had not worked with before and again that’s related to enabling the new models.
Okay well I think that will wrap up this video. Hope this helps provide some context for you and we look forward to working with you and talking to you in Slack. Thanks.